


![[Must-have] Knitting Yarn and Wire Set - Caydo](http://www.caydo.com/cdn/shop/files/3_4c349a4b-7e4d-4fa8-b6df-6561cf08410c.jpg?v=1731059827&width=298)
![[Must-have] Knitting Yarn and Wire Set - Caydo](http://www.caydo.com/cdn/shop/files/1_c1a8ec5f-79f5-4c02-b655-aaba689678cf.jpg?v=1731060862&width=298)


Learning how to read knitting patterns is like unlocking a secret language that opens up endless creative possibilities. Those mysterious abbreviations, symbols, and instructions might seem intimidating at first, but with a few key insights, you'll be translating pattern-speak into beautiful knitted creations in no time.
Whether you're staring at your first pattern or trying to level up your knitting skills, this guide will demystify the process and build your confidence. We'll break down each element of knitting patterns into manageable pieces, so you can focus on enjoying your craft rather than decoding instructions. Ready to transform those cryptic knitting codes into cozy masterpieces?
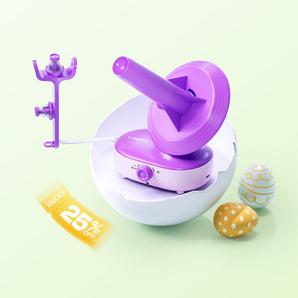
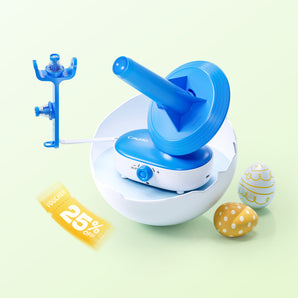
Keep your yarn organized while working through complex patterns! Explore our premium yarn winders to prevent tangles and make your knitting experience smoother.
Understanding Knitting Pattern Terminology

Knitting patterns use specific abbreviations and symbols to communicate instructions. Learning this language helps you turn directions into finished projects.
Common Abbreviations Explained
Patterns use short codes to save space and make instructions clearer. Here are the most essential abbreviations to know:
- K: Knit stitch
- P: Purl stitch
- CO: Cast on
- BO: Bind off
- YO: Yarn over (creates a hole/increase)
- K2tog: Knit two stitches together (decrease)
- SSK: Slip, slip, knit (decrease)
- RS: Right side
- WS: Wrong side
Different patterns may use slightly different abbreviations, but most include a key at the beginning. As you practice, you will memorize these basics.
Deciphering Stitch Descriptions
Stitch descriptions explain how to create textures and designs. For example, garter stitch means knitting every row, creating a bumpy texture.
Stockinette stitch alternates between knit rows and purl rows. Special stitches might include detailed multi-step instructions.
For instance:
Bobble: (K1, P1, K1, P1, K1) all in one stitch, turn, P5, turn, K5, turn, P5, turn, K2tog K2tog K1
Break complex instructions down step by step. Most patterns provide row-by-row instructions, so focus on one line at a time.
Reading Pattern Repeats
Pattern repeats tell you to work certain stitches multiple times. They often appear in brackets or parentheses with a multiplier:
- (K1, P1) 5 times means "knit 1, purl 1" repeated 5 times
- [K2, P2] to end means repeat "knit 2, purl 2" until you reach the row's end
Asterisks are also common: K2, P1, K1 repeat from * to end means knit 2, then work "purl 1, knit 1" repeatedly until you finish the row.
Pay attention to which sections get repeated. Chart-based patterns use symbols instead of text, with each symbol representing a specific stitch type.
Breaking Down Pattern Sections
Knitting patterns have several sections that help you prepare for and complete your project. Each section guides you through materials, sizing, and knitting instructions.
Material Requirements And Gauge
Every pattern starts with a list of what you need. This includes yarn, knitting needle sizes, and other tools like stitch markers or cable needles.
- Yarn: Specifies weight (worsted, DK, etc.), fiber content, and how many skeins or yards
- Knitting Needles: Size and type (circular, double-pointed, straight)
- Notions: Stitch markers, tapestry needle, scissors, etc.
The gauge section tells you how many stitches and rows should measure in a specific area, often 4×4 inches. To match gauge, you might need to switch needle sizes.
Always knit a gauge swatch before starting your project. If your gauge is too tight, use a larger needle. If too loose, use a smaller one.
Size And Measurement Information
Patterns usually offer multiple sizes in a chart or list. You will see measurements for:
- Finished chest/bust width
- Length from shoulder to hem
- Sleeve length
- Total width
Choose your size based on finished measurements, not your regular clothing size. Most patterns recommend adding 1-2 inches of ease for comfort.
Highlight your chosen size throughout the pattern to avoid confusion. Some patterns use colors or columns for each size, while others list numbers in parentheses like "Cast on 76 (84, 92, 100) stitches."
Construction Instructions
This section explains how to knit your project. Instructions are usually written row by row, with special stitches explained at the beginning.
- Cast On: How many stitches to begin with
- Shaping: Where to increase or decrease stitches
- Stitch Patterns: Written directions or charts for textures and designs
- Binding Off: How to finish your work
Pay attention to repeated sections marked by asterisks or phrases like "repeat from * to end of row." These shortcuts help avoid writing out repeated instructions.
For complex patterns, work one step at a time and mark your progress. Use sticky notes or a row counter to keep track of where you are.
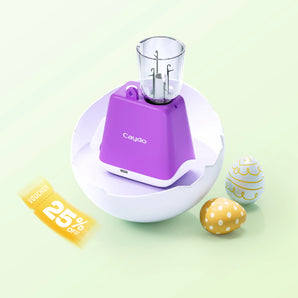
Maintain consistent tension as you follow pattern instructions with our ergonomic yarn ball holders – the perfect companion for any knitting project!
Interpreting Pattern Charts And Symbols

Knitting patterns often include charts that represent stitches visually instead of with written instructions. Charts can make complex patterns easier to follow once you understand them.
Reading Basic Chart Symbols
Charts use symbols to show different knitting stitches. Each box on the chart stands for one stitch in your knitting.
Common symbols include empty boxes for knit stitches and boxes with dots or dashes for purl stitches. Read knitting charts from the bottom up, since that's how you build your knitting.
For flat knitting, read right-side rows from right to left and wrong-side rows from left to right. For circular knitting, always read from right to left.
Look for a key or legend that explains what each symbol means. If you're unsure, check the pattern notes or search online for standard chart symbols.
Many charts use asterisks (*) to show repeated sections. When you see an asterisk, repeat those steps until you reach another marker or the end of the row.
Working With Color Charts
Color charts show you how to use different colored yarns. Each box represents a stitch and its color.
Different colors or shading in each box indicate which yarn color to use for that stitch. Always check the pattern's color key to use the right colors.
For colorwork, you might carry multiple yarns across the back of your work. This is called "stranding" or "fair isle knitting."
Use stitch markers to track your place in color patterns. Place them at repeats or color changes to avoid mistakes.
Highlight rows on your chart as you complete them to stay organized. This helps you keep track in complex designs.
Understanding Cable Charts
Cable charts show you how to create twisted, rope-like textures. These charts look more complex because cables involve moving stitches around on your needles.
Special symbols show when to move stitches in front of or behind your work. For example, a right-leaning line might mean "hold 2 stitches on cable needle in front, knit 2, then knit the held stitches."
Cable charts often include blank rows. These are usually "rest rows" where you knit the knit stitches and purl the purl stitches without cable crossings.
Pay attention to the direction of cable symbols. They show which way to cross your stitches—whether to hold them in front or in back of your work.
Cable charts require careful counting. Use stitch markers to track complex patterns.
Troubleshooting Pattern Confusion
Even experienced knitters sometimes get stuck on confusing pattern instructions. When you encounter unclear directions or something doesn't look right, you can use several strategies to move forward.
Common Pattern Mistakes And Discrepancies
Patterns sometimes contain errors that can affect your project. If your stitch count doesn't match the pattern, double-check your work first.
Count your stitches after each row to catch mistakes early. Watch for inconsistencies in the pattern itself.
Sometimes designers accidentally omit increases or decreases. If your work doesn't match the photos or your stitch count is consistently off, you might have found a pattern error.
Use a highlighter to mark your current row. Sticky notes or row counters also help you keep track in complex patterns.
Lay your work flat without stretching when measuring. Measure from the needle to your cast-on edge to confirm you've reached the correct length before moving on.
When To Contact The Pattern Designer
If you can't resolve an issue after troubleshooting, contact the pattern designer. Before reaching out, document your specific question with details about:
- The exact pattern name and version
- The section where you're having trouble
- What you've tried already
- Photos of your work in progress
Most designers welcome correction notices and appreciate clear questions. They want their patterns to be successful and clear for knitters.
Allow designers time to respond. If the pattern was published in a magazine or book, the publisher may provide support contact information.
Using Online Resources For Clarification
Online communities offer valuable support when you're stuck. Ravelry.com hosts forums where knitters share tips and solutions for specific patterns.
YouTube tutorials can show techniques mentioned in your pattern. Search for the exact stitch or technique name to find videos.
Social media groups dedicated to knitting provide quick feedback. Post clear photos of your work and the specific pattern section causing confusion.
Online stitch dictionaries help clarify abbreviations or techniques. Websites like Craft Yarn Council offer standardized abbreviation lists to help you understand pattern language.
Ready to tackle more complex patterns? Our home knitting machines help you breeze through basic sections while you focus on the intricate details by hand!
Conclusion: How To Read Knitting Patterns
Learning how to read knitting patterns takes practice, but with each project, you'll become more fluent in this special language. Remember that even experienced knitters occasionally get stuck on tricky instructions—it's all part of the creative journey.
Start with simpler patterns as you build confidence, and don't hesitate to use online communities and video tutorials when you encounter unfamiliar terms. Soon, those mysterious abbreviations and symbols will transform into beautiful, tangible creations you can proudly share with others!
Ready to expand your knitting knowledge? Check out our comprehensive Knitting Needle Size Chart to ensure you're using the right tools for your next pattern adventure!
Frequently Asked Questions: How To Read Knitting Patterns
What does * mean in knitting?
The asterisk (*) in knitting patterns marks a section of instructions you need to repeat. When you see text between asterisks, repeat those steps as specified in the pattern. For example, if a pattern says "*K2, P2* repeat 5 times," knit 2 stitches, purl 2 stitches, then repeat that sequence 5 more times across your row.
What does YTB mean in knitting?
YTB stands for "yarn to back," instructing you to move your working yarn from the front to the back before the next stitch. This yarn positioning affects how your stitches form and create the correct appearance. Knitters typically use YTB before knit stitches to ensure proper technique.
What does ssk mean in knitting patterns?
SSK means "slip, slip, knit," a left-leaning decrease that removes one stitch from your work. To perform it, slip two stitches knitwise one at a time, then insert your left needle into these stitches' front and knit them together. This technique is essential for shaping garments and creating lace patterns.
What is a taat in knitting?
TAAT stands for "two at a time," a technique for knitting two identical items simultaneously using a long circular needle. Popular for socks, mittens and sleeves, this method ensures both items match exactly in size and length. While requiring more concentration initially, TAAT saves time and prevents "second item syndrome."

