Learning how to use a yarn winder transforms the way you manage your fiber projects. This simple device can turn those unwieldy skeins into neat, compact cakes that stack perfectly, feed smoothly, and make your crafting experience significantly more enjoyable.
Whether you're tired of yarn tangles or simply want to organize your growing collection, a yarn winder is a game-changer for knitters and crocheters alike. In this guide, we'll walk through everything you need to know to create perfect yarn cakes that will revolutionize your crafting routine. Let's start winding!
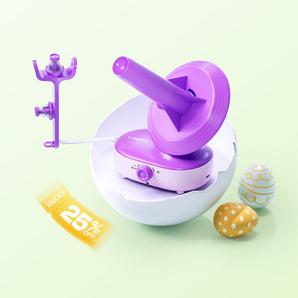
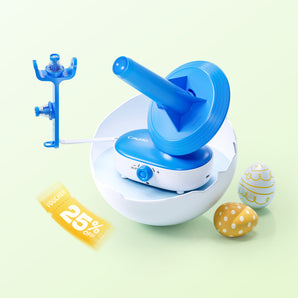
Save time and your hands with our electric yarn winder collection. Effortless operation creates perfect cakes while you relax—the ultimate stash organization upgrade!
What Is A Yarn Winder?
A yarn winder transforms loose skeins into neat, compact yarn cakes in minutes. Unlike tedious hand-winding, it creates uniform, center-pull cakes that won't roll away during your projects.
The investment pays off quickly in time saved and frustration avoided—essential for managing leftover yarn, frogging projects, and preparing multiple skeins for larger works.
Yarn Winder Key Components
- Clamp Base: Secures the winder firmly to a table or workspace edge.
- Yarn Guide: Controls tension and directs yarn smoothly onto the spool.
- Rotating Spool/Bobbin: The core component where yarn wraps to form the cake.
- Crank Handle (manual models): Allows you to control winding speed with hand power.
- Motor (electric models): Provides consistent, hands-free winding at adjustable speeds.
- Gears: Transfer rotational force from the handle or motor to the spool.
The organized cakes stack efficiently, making storage simpler and your crafting space neater. Most winders come in different sizes to accommodate various yarn weights and project needs.
How To Setup Your Yarn Winder

A proper setup makes yarn winding faster and creates cakes that pull smoothly from the center.
Assembling The Yarn Winder
Before you can create perfect yarn cakes, you'll need to properly set up your winder. Follow these simple steps for a secure assembly:
- Place your yarn winder on a sturdy table and tighten the clamp mechanism firmly to prevent movement.
- Insert the metal or plastic guide rod into its designated slot if not already attached.
- Attach the handle to the side of the winder and check that it turns smoothly.
- Set the tension dial (if available) to medium initially.
- Test the mechanism by turning the handle slowly before adding yarn.
How To Position Your Yarnn Winder for Best Results
Proper placement of your equipment ensures smooth winding and prevents frustrating tangles:
- Position your winder at the table edge with 2 feet of clear space around it.
- Set up your yarn swift 2-3 feet away from the winder.
- Align the swift and winder so yarn travels in a straight line between them.
- If you don't have a swift, place your yarn skein on a chair back or have someone hold it.
- Adjust both devices to the same height for the smoothest yarn path.
Step-By-Step Yarn Winding Process
A perfect yarn cake requires proper preparation and consistent tension. Follow these steps for professional results:
Preparing Your Yarn
Now that your winder is properly set up, it's time to prepare your yarn for winding. This crucial prep work prevents frustrating tangles and ensures a smooth process:
- Find the outer end of your skein or hank.
- Place hank on a swift or chair back to prevent tangling.
- Remove any labels or bands that might interfere.
- Thread the yarn end through the center hole of your winder.
- Secure the yarn end in the notch at the top of the central spindle.
- If available, thread yarn through the tension guide before connecting to spindle.
Creating Perfect Tension
With your yarn secured to the winder, maintaining the right tension becomes your primary focus. This determines whether your cake will hold its shape or collapse:
- Hold the yarn lightly between your fingers, applying gentle, consistent pressure.
- Turn the handle at a steady, moderate pace.
- Guide the yarn back and forth across the spool with your free hand for even layers.
- If using a manual guide, move your hand slowly up and down to distribute yarn evenly.
- For larger skeins, pause occasionally to ensure the cake is building uniformly.
- When finished, tuck the outer end under the last few strands to secure it.
- Remove the cake by lifting straight up from the spindle.
Prevent yarn cakes from rolling away with our yarn ball holder collection. Maintain perfect tension and eliminate tangles as you work!
Common Yarn Winding Problems (And How To Fix Them)
Even experienced crafters encounter challenges with their yarn winders. Understanding common issues and their solutions will help you create perfect yarn cakes every time:
Dealing With Tangles And Knots
Tangles can quickly transform a relaxing winding session into a frustrating experience. Here's how to prevent and address them:
- Always check your yarn for knots before starting the winding process.
- Ensure your swift spins freely without catching on any parts.
- Maintain a moderate, steady pace—winding too quickly causes yarn to fly off.
- Stop immediately when tangles occur; continuing only worsens the problem.
- Gently work through tangles with your fingers, moving from outside inward.
- For tangle-prone yarns like mohair, try winding with slightly more tension.
- Consider placing slippery yarns in a bowl where they can spin freely.
Fixing Uneven Tension Issues
Lopsided yarn cakes that won't stand properly typically result from tension problems. These simple fixes can help achieve balanced, stable cakes:
- Hold the yarn between your fingers to maintain light, even tension throughout.
- Aim for consistent pressure—not too tight, not too loose.
- Check if your winder's main gear has slipped off the smaller gear.
- Fix misaligned gears by removing two screws, opening the winder, and realigning them.
- Secure your winder firmly to prevent wobbling during operation.
- Use a clamp with rubber padding to stabilize your winder for better results.
- Distribute yarn evenly across the cake by guiding it as it winds.
Create perfect cords in minutes with our i-cord knitting machine collection—essential for professional-looking drawstrings, handles, and decorative elements!
Conclusion: How To Use a Yarn Winder
Mastering your yarn winder transforms your crafting experience from frustrating to fluid. With practice, you'll create perfect yarn cakes that maintain tension, prevent tangles, and make your projects more enjoyable from start to finish.
Remember that each yarn type might require slight adjustments to your technique. Don't be discouraged by initial challenges—like any crafting skill, winding becomes easier and more intuitive with time.
Now that you've learned how to create perfect yarn cakes, expand your fiber knowledge by exploring our comprehensive guide to types of yarn and discover which varieties work best with your new winding skills!
Frequently Asked Questions: How To Use a Yarn Winder
Can I use a yarn winder without a swift?
Yes, you can use a yarn winder without a swift by using simple alternatives. Drape yarn over a chair back, place it in a box to rotate freely, or have someone hold it for you. Regular balls or skeins can be wound directly without needing a swift at all.
What is the difference between a swift and a winder?
A swift holds and rotates your hank of yarn to prevent tangling as you pull from it. A yarn winder creates the actual cake-shaped ball using a crank or motor to wind yarn around a center post. They work together but serve completely different functions in the yarn preparation process.
What to use instead of a yarn swift?
Use the back of a chair, a laundry rack, or two chair backs placed apart to hold your yarn. Your knees or a friend's outstretched hands can work in a pinch for smaller hanks. A nostepinne (traditional wooden tool) lets you hand-wind beautiful cakes without any mechanical equipment.
How do you wind yarn so it doesn't twist?
Wind at a moderate, consistent speed with relaxed tension between the yarn source and winder. Adjust the tension using your winder's guide wire or arm if available. When hand winding, rotate the cake itself rather than the yarn to preserve the fiber's natural twist.


![[Must-have] Knitting Yarn and Wire Set - Caydo](http://www.caydo.com/cdn/shop/files/3_4c349a4b-7e4d-4fa8-b6df-6561cf08410c.jpg?v=1731059827&width=298)
![[Must-have] Knitting Yarn and Wire Set - Caydo](http://www.caydo.com/cdn/shop/files/1_c1a8ec5f-79f5-4c02-b655-aaba689678cf.jpg?v=1731060862&width=298)


