


![[Must-have] Knitting Yarn and Wire Set - Caydo](http://www.caydo.com/cdn/shop/files/3_4c349a4b-7e4d-4fa8-b6df-6561cf08410c.jpg?v=1731059827&width=298)
![[Must-have] Knitting Yarn and Wire Set - Caydo](http://www.caydo.com/cdn/shop/files/1_c1a8ec5f-79f5-4c02-b655-aaba689678cf.jpg?v=1731060862&width=298)


Casting on is the first step in any knitting project, and learning how to cast on knitting is essential for getting started.
This simple technique puts stitches onto your needle, setting the stage for everything you create.
Whether you're a beginner or need a refresher, mastering different cast-on methods can make a big difference in your knitting.
From the versatile longtail cast-on to the classic knitted cast-on, each method has its benefits.
In this guide, you'll learn how to cast on knitting with seven simple steps perfect for beginners.
What is Casting On in Knitting?
In knitting, "casting on" refers to the process of placing the initial stitches onto the needles, forming the foundation of your knitting project.
Why It Matters:
- Sets the base for your project’s structure
- Affects the edge, stretch, and durability of your knit piece
Choosing the Right Cast-On:
Different projects benefit from different cast-on methods:
- Socks – A stretchy cast-on provides comfort and flexibility
- Scarves – A decorative cast-on adds a stylish edge
- Sweaters – A sturdy cast-on helps maintain shape and support
Selecting the right method ensures your project looks and functions as intended.
How to Cast On Knitting: Step-by-Step Guide for Beginners
Casting on is the first step in knitting, creating the foundation for your project. Follow these simple steps to get started:
Step 1. Make a Slipknot

Photo Source: whileberry.com/
Some methods start with a slipknot, while others don’t. If using a slipknot, place it on the needle and tighten it gently.
Step 2. Hold the Yarn

Photo Source: whileberry.com/
Drape the yarn over your left thumb and index finger, creating a loop. Secure the yarn with the rest of your fingers to keep it in place.
Step 3. Position the Needle

Photo Source: whileberry.com/
Hold the needle in your right hand. Insert it under the strand around your thumb from front to back.
Step 4. Catch the Yarn

Photo Source: whileberry.com/
Move the needle over and pick up the strand on your index finger. This creates a new loop on the needle.
Step 5. Pull the Yarn Through

Photo Source: whileberry.com/
Gently pull the loop through the strand on your thumb. Let the yarn slip off your thumb and place the new stitch onto the needle.
Step 6. Adjust the Stitch

Photo Source: whileberry.com/
Lightly tighten the stitch so it sits snugly on the needle. Avoid pulling too tight, as stitches should be easy to work with.
Step 7. Repeat Until Ready
Continue casting on until you have the required number of stitches. Keep practicing for even tension and consistency. Once your stitches are on the needle, you can start knitting!
Watch the Video Tutorial on How to Cast On Knitting
Materials Needed for Casting On

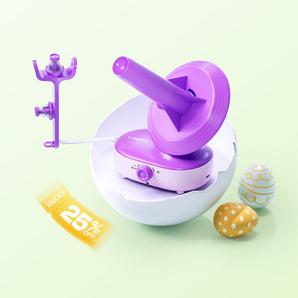
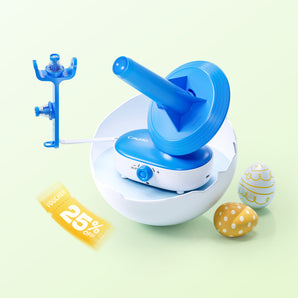
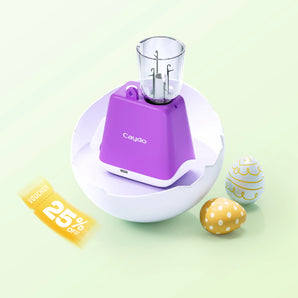
🛒 Electric i-Cord Knitting Tricotin Machine i1 Pro Max
When you begin knitting, having the right materials is important. Here are the essentials you need to get started on casting:
-
Knitting Yarn: Choose a yarn that suits your project. Beginners often find it easier to work with medium-weight yarns, such as wool, which don't slip as easily.
-
Knitting Needles: Select a pair of knitting needles that match your yarn. Commonly, US size 6 or 8 needles are good for most beginners.
-
Scissors: A small pair of scissors helps cut your yarn cleanly and accurately.
-
Measuring Tape or Ruler: This helps check the length of yarn needed for various cast-on techniques like the Longtail Cast-On.
Having these materials on hand makes the process smoother and more enjoyable. Once you're set with these, you're ready to start casting on and creating stitches.
Casting On Techniques

Casting on is essential in knitting, creating the foundation for every project. Several techniques are available to suit different needs, such as creating a stretchy edge or a firm base.
1. Single Cast On
The Single Cast On is simple and perfect for beginners. It's often called the backward loop or thumb method.
- Make a slip knot and place it on your needle.
- Use your thumb and forefinger to create a loop with the yarn.
- Slide the loop onto the needle and tighten it gently.
This method is quick and works well for projects where the edge isn't stressed. However, it can be loose and doesn't provide much elasticity, so it's not ideal for garments.
2. Long Tail Cast-On Method
The Long Tail Cast-On creates a neat, firm edge and is highly popular among knitters. It starts with a slip knot, leaving a long tail of yarn.
- Form the slip knot on your needle.
- Use one hand to hold the yarn with a tail in front, creating three yarn strands.
- Push the needle from front to back through the loop on your thumb.
- With the needle, grab the yarn over your index finger and pull it through the loop on your thumb.
This method gives a stretchy, versatile edge, perfect for most projects, such as hats and cuffs.
3. Knitted Cast-On Technique
The Knitted Cast-On feels like the traditional knit stitch and is excellent for beginners.
- Create a slip knot and place it on your needle.
- Insert the second needle through the slip knot and knit a stitch without sliding it off.
- Transfer the new loop to the first needle and tighten it slightly.
This technique is great for projects with a firm edge and is easy to learn as part of standard knitting.
4. Cable Cast-On Method
The Cable Cast-On provides a strong, non-stretchy edge, ideal for decorative work. It's similar to the knitted cast-on but uses a slightly different approach.
- Make a slip knot and knit the first stitch.
- Place the new loop on the left needle.
- Position your right needle between the first two stitches and knit the next stitch.
- Transfer this loop back to the left needle.
This method offers a beautiful, even edge, perfect for pieces needing structure, like blankets.
Choosing the Right Cast-On for Your Knitting Project

Consider what you're making when choosing a cast-on method for your knitting project. Different projects benefit from different techniques. Here's a quick guide:
-
Sweaters: Long-tail or cable cast-on provides a firm edge that’s perfect for garments.
-
Socks & Hats: Use the German twisted or tubular cast-on for stretchy edges. These methods offer elasticity, which is great for items that need to fit snugly.
-
Lace Knitting: A provisional cast-on lets you add borders or other sections later. This method is great when you need flexibility to start from an open edge.
- Beginners: Start with a knit or long-tail cast-on. These methods are easy to learn and provide a solid foundation as you start your knitting journey.
Expert Tips for Casting ON
Follow these simple tips to ensure a smooth and even cast-on:
✓ Count the Slip Knot – If you start with a slip knot, remember that it counts as a stitch when tallying your stitches.
✓ Avoid Tight Stitches – Casting on too tightly makes it hard to knit the first row. If this happens:
- Try using a larger needle for the cast-on, then switch to the correct size.
- Cast on with two needles held together, then remove one for looser stitches.
✓ Use the Needle Body – Cast on stitches onto the thicker part of the needle, not just the tapered tip, to prevent tight stitches.
✓ Don’t Cast On Too Loose – Loose and uneven stitches can make your edge look messy. If this happens, try using a smaller needle for the cast-on.
✓ Count Stitches Efficiently – Speed up counting by grouping stitches in twos, fives, or another pattern that works for you.
✓ Consider the First Row – Long Tail and Knitted Cast-Ons create a row of purl bumps on the back. If you want a smooth edge on the front, start your project on a wrong-side row. However, this is just a personal preference and may not be necessary for every project.
By following these tips, you’ll get a more even and consistent start to your knitting projects!
Common Casting-On Mistakes & How to Fix Them

Uneven Stitches
Inconsistent tension can make your cast-on look messy. Keep the yarn at a steady tightness throughout, and practice regularly to develop a natural feel for even tension.
Running Out of Yarn in Long-Tail Cast-On
Estimating yarn length can be tricky. A simple trick is to wrap the yarn around your needle ten times and measure the length. To get a better estimate, multiply it by the number of stitches needed.
Too Tight or Too Loose Edges
- Too Tight? Use a larger needle to cast on, then switch to the correct size for knitting.
- Too Loose? Keep a firm but relaxed grip on the yarn to maintain even tension.
Fixing these common mistakes early will help your knitting look cleaner and more polished.
Final Thoughts
Mastering how to cast on is the first step to a successful knitting project. You'll develop smooth, even stitches and gain confidence in your technique with practice.
Whether you're knitting scarves, socks, or sweaters, choosing the right cast-on method ensures your project starts off strong.
Now that you've learned the basics, why not take your knitting further? The Caydo Electric i-Cord Knitting Machine i1 Pro makes creating i-cords effortless, reducing hand fatigue and speeding up the process.

This innovative tool, perfect for handbag handles, home decor, and crafts, helps you enjoy knitting in a whole new way.
Frequently Asked Questions
Learn the basics of casting on and off in knitting, including tips for neat and easy techniques. Different projects require different methods, so choose wisely based on your needs.
What is the neatest cast on in knitting?
The long-tail cast-on is one of the neatest and most versatile methods. It creates a smooth, even edge with some stretch, making it great for most projects. If you need a firmer edge, the tubular cast-on gives a polished, seamless look, ideal for ribbed edges. Choosing the right cast-on method depends on your project’s needs.
What is the best way to cast off in knitting?
The standard bind-off is the most commonly used and provides a clean, firm edge. The elastic bind-off or sewn bind-off works well for a stretchier finish, especially in ribbing. Always keep your tension even to prevent the edge from being too tight or too loose. Blocking your piece afterward can help smooth out the cast-off edge.
What’s the best cast-on for circular knitting?
The long-tail cast-on is a great all-purpose choice for circular knitting because it's stretchy and even. If you're working ribbing, the German twisted cast-on adds extra elasticity. For a seamless start, use the invisible cast-on or provisional cast-on, which allows you to pick up stitches later. Always join carefully to avoid twisting your stitches.
How do I cast on stitches in the middle of a row?
Use the backward loop cast-on or the knitted cast-on to cast on in the middle of a row. The backward loop method is quick but can be loose, while the knitted cast-on gives a firmer edge. Insert your right needle into the last stitch, knit a new loop, and place it back onto the left needle. Repeat until you have the needed stitches.
Why does my cast-on row look too tight or too loose?
If your cast-on is too tight, try using a larger needle or a stretchier cast-on like the German twisted cast-on. If it’s too loose, keep your tension even and use a smaller needle for casting on. Make sure you’re placing stitches on the thickest part of the needle, not just the tapered tip. Practicing different cast-on techniques can help you find the right balance.

