


![[Must-have] Knitting Yarn and Wire Set - Caydo](http://www.caydo.com/cdn/shop/files/3_4c349a4b-7e4d-4fa8-b6df-6561cf08410c.jpg?v=1731059827&width=298)
![[Must-have] Knitting Yarn and Wire Set - Caydo](http://www.caydo.com/cdn/shop/files/1_c1a8ec5f-79f5-4c02-b655-aaba689678cf.jpg?v=1731060862&width=298)


Learning how to make a yarn ball is an essential skill for any knitter or crocheter who wants to keep their materials organized and tangle-free.
The process is remarkably simple - start by creating a small bunch with the yarn end, then wrap around this core in a circular motion while keeping your thumb pinched in the middle.
As you continue wrapping, a neat ball forms that won't unravel or tangle during your projects. This no-tool technique transforms frustrating yarn messes into perfectly wound balls ready for your next creation.
Read on to master this fundamental crafting skill in minutes!
Essential Supplies for Yarn Ball Making

Making your own yarn ball is easy and requires just a few simple items. The right tools will help you create neat, usable yarn balls that won't tangle during your projects.
Basic and Optional Tools for Winding Yarn Balls
Must-have items:
- Your yarn skein or hank
- Scissors (to cut the yarn when finished)
- Your hands (yes, they're the most basic tool!)
Helpful basic tools:
- Cardboard circles (cut from boxes with a hole in the middle)
- A pencil or dowel (to wrap yarn around at the start)
- A chair back or willing helper (to hold the yarn as you wind)
Optional tools that make the job easier:
- Yarn swift (holds your yarn while you wind)
- Yarn winder (creates center-pull balls quickly)
- Nostepinne (a wooden stick made just for winding yarn)
You don't need fancy equipment to make a good yarn ball. Many crafters wind balls by hand with no special tools at all! The simplest method just needs your hands and the yarn itself.
Hand-Winding Yarn Ball Methods
Winding yarn by hand is a useful skill for any knitter or crocheter. You can create neat, tangle-free yarn balls without fancy tools using just your hands and a bit of patience.
Traditional Ball vs. Center-Pull Technique
The traditional yarn ball is wound around itself with the working end on the outside. This type rolls around while you work.
The center-pull ball is better because you can pull yarn from the middle. This stops the ball from bouncing away while you knit or crochet.
For a traditional ball, wrap yarn around your fingers a few times. Then remove from fingers and keep wrapping in different directions to make a round ball.
For a center-pull ball, start by wrapping yarn loosely around your thumb 3-4 times.
Keep it very loose! Then wrap yarn around this starting loop, changing directions often. The loose space where your thumb was becomes the center from which you'll pull.
Step-by-Step Winding Process and Securing Tips

- Start with your yarn skein laid flat. Find both ends of the yarn.
- Set aside one end (this will be your center pull) and hold it with your thumb.
- Wrap the yarn loosely around your thumb or fingers 3-4 times. Remove your digits while holding the small loops you've created.
- Begin wrapping yarn around this core, changing directions often. This helps create a stable ball.
- Important tip: Keep some fingers between the ball and the yarn you're wrapping.
- This prevents winding too tight, which stretches your yarn.
- For security, tuck the outside end under a few strands when you finish.
- Never pull yarn too tight when winding - it damages the fiber's elasticity.
Using Tools to Make Yarn Balls
Making yarn balls becomes easier and more efficient when you use the right tools. Whether you prefer specialized equipment or simple DIY options, there's a method that will work for your yarn winding needs.
Yarn Swift and Ball Winder Method
A yarn swift and ball winder combo is the fastest way to make neat yarn balls. The swift holds your skein of yarn and spins as you pull from it.
You attach the loose end to the ball winder, which creates a center-pull cake of yarn as you turn the handle. This method saves lots of time!
You can wind a full skein in about 2 minutes, compared to 15-20 minutes by hand.
Ball winders come in different sizes and materials.
Plastic ones work well for regular use, while wooden winders last longer. The yarn cakes made this way stack neatly and don't roll away while you're working. They also pull from the center, which keeps your yarn tangle-free during your project.
DIY and Traditional Winding Tools
A "nystpinne" (a wooden nostepinne) is a simple stick-like tool used in Nordic countries for centuries. You wrap yarn around it to create the center of your ball.
Another DIY option is to use everyday items like toilet paper tubes or even your thumb and finger to start the ball.
Once you have a small center formed, you can wind yarn around it in different directions to create a stable ball.
The yarn ball method using a DIY classroom tool involves wrapping yarn in a figure-8 pattern around your fingers, then removing and wrapping more yarn around the middle.
This technique works well for rhythm passing games too!
You can also make a simple winding tool by cutting a notch in a wooden dowel or chopstick.
This helps grab the yarn as you start your ball.
Yarn Ball Techniques for Different Yarn Types
Different yarns need different winding methods to make them easy to use. The type of yarn affects how you should handle it when making a ball.
Working with Delicate, Bulky and Specialty Yarns
Delicate yarns like lace or silk need gentle handling.
Wind these yarns loosely to avoid stretching them. Don't pull too tight or you might damage the fibers.
Bulky yarns work best when wound into center-pull balls. This makes them easier to use without the ball bouncing around.
You can use your thumb as a base when starting to create a center hole.
For fuzzy yarns like mohair or eyelash yarn, wind slowly to prevent tangling. These yarns catch on themselves easily!
Quick Tips for Specialty Yarns:
- Metallic yarns: Wind loosely to prevent kinking
- Cotton yarns: Can be wound tightly as they have less stretch
- Multi-strand yarns: Keep strands together while winding
Converting Hanks to Usable Yarn Balls
Hanks need to be changed into balls before you can use them.
First, place the hank around a chair back, swift, or helper's hands to form a large loop.
Cut the ties holding the hank together. Find one end of the yarn before you start winding. This saves time and prevents tangles.
You can wind by hand or use tools.
For hand-winding, wrap yarn around your fingers a few times. Then remove and start wrapping around this small bundle to form your ball.
A nostepinne (wooden stick) helps make center-pull balls. Wrap yarn around it several times, then wind in a criss-cross pattern while rotating.
Ball winders make quick work of hanks. They create neat cakes of yarn that pull from the center. This keeps your yarn clean and prevents it from rolling away while working.
How To Fix Common Yarn Ball Issues
Even the most careful yarn winders encounter problems sometimes. When your yarn ball isn't turning out right, there are simple solutions that can help you get back to your crafting quickly.
Fixing Tension, Tangles and Misshapen Balls
When your yarn ball looks wonky or uneven, check your winding tension first.
Too tight and your ball will be hard and stretch the yarn. Too loose and it will fall apart easily. Try to maintain a medium, even tension as you wind.
Tangles happen to everyone! If you hit a knot, stop winding and gently work it out with your fingers.
Don't pull hard or you might break the yarn. For stubborn tangles, lay the yarn on a flat surface and slowly untangle one strand at a time.
For a misshapen ball, you can try the "magic ball" method.
This technique lets you wind yarn without any tools while creating a center-pull ball. Simply wrap yarn around your fingers, remove carefully, and then wind perpendicular to your starting wraps.
When joining new colors, try a "Russian join" instead of knots.
This method weaves yarn ends together for a smooth color change without bulky knots that could ruin your ball shape.
If your yarn gets twisty, let the ball hang freely to untwist naturally. Sometimes just dropping the ball and letting it spin can fix the problem.
Storing and Using Your Yarn Balls

Now that you've made your yarn balls, proper storage and usage will keep them neat and ready for your projects. Good storage prevents tangling and protects your yarn from damage.
Storage Best Practices and Project Usage
Store your yarn balls in a clean, dry place away from sunlight to prevent fading.
Plastic bins with lids work great to keep dust and pets away from your yarn. You can also use cloth bags or old pillowcases to store multiple balls together.
When you're ready to knit, place your yarn ball in a bowl so it doesn't roll around while you work.
If you made a center-pull ball, you can pull yarn from the middle which keeps the ball stationary.
For traveling with your projects, try using a yarn bowl or a zippered bag with a small hole cut in it.
This lets your yarn feed through while keeping it clean.
Label your yarn balls with information like fiber content and yardage.
You can use masking tape or tie on a small paper tag. This helps when you need to match yarns later.
Try winding smaller balls if you're working on multicolor projects.
This makes it easier to switch between colors without dealing with large, unwieldy balls of yarn.
Conclusion
Making your own yarn ball is both practical organization and the foundation of an enjoyable crafting experience. Taking minutes to properly wind your yarn saves hours of frustration with tangles during projects. This simple hand-winding technique works for all yarn types with no special equipment needed.
As you grow comfortable with basic winding, you might explore center-pull balls or winding tools.
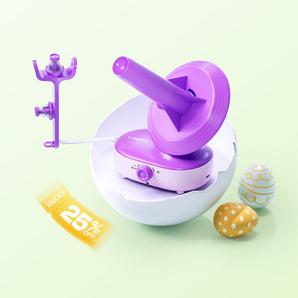
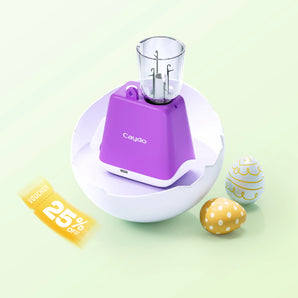
For crafters ready to elevate their yarn organization, Caydo's yarn ball winders create perfect center-pull cakes in seconds. Check out their range of winders to transform your stash into beautifully organized balls that make every project more enjoyable!
Frequently Asked Questions
What's the simplest way to create a yarn ball for crafting projects?
The simplest way to make a yarn ball is to wrap yarn around your fingers a few times. Then slip it off and start wrapping the yarn around this small bundle.
Keep turning the ball as you wrap to get an even shape. No special tools needed!
You can also use a small object like a cork or piece of cardboard as a starting point. This method works well when you're in a hurry or don't have any tools handy.
What are the steps to make a yarn ball that's perfect for knitting?
For a knitting-friendly ball, try making a center-pull ball. Start by leaving a 6-inch tail and wrap yarn around four fingers about 15 times.
Slip this off, then wrap yarn around the middle of the bundle. Turn the bundle often to make an even ball. The key is to not pull too tight.
Leave the beginning tail hanging out – this becomes your center-pull end. Tuck the outside end under a few strands when finished.
This type lets you pull yarn from the middle, which won't roll away while knitting.
What's the trick to forming a yarn ball without using a winder?
The main trick is changing direction often. Wrap yarn horizontally, then vertically, then diagonally. This creates a stable ball shape.
Keep the ball loose enough to prevent stretching the yarn. A tennis ball-sized yarn ball is perfect for most projects.
You can also use everyday objects as winders. A toilet paper tube, wooden spoon, or even an old DVD case can help you wind yarn evenly without fancy tools.
Why do crafters often roll yarn into a ball before starting their projects?
Rolling yarn helps find problems like knots or weak spots before you start your project. It's frustrating to find these issues mid-project!
Balls are easier to work with since they don't tangle as much as loose skeins. They stay put in your project bag instead of unraveling everywhere.
Some yarn comes in hanks or skeins that must be rewound before use. These forms are great for storing and dyeing yarn but can tangle badly if you try to work directly from them

